
An invoice starts as a draft. Add the client, the work supplied and the payment details, then inspect the preview before sending. On the web you can create invoices and download PDFs without an account.
Create the draft
- Open Invoices and choose New invoice.
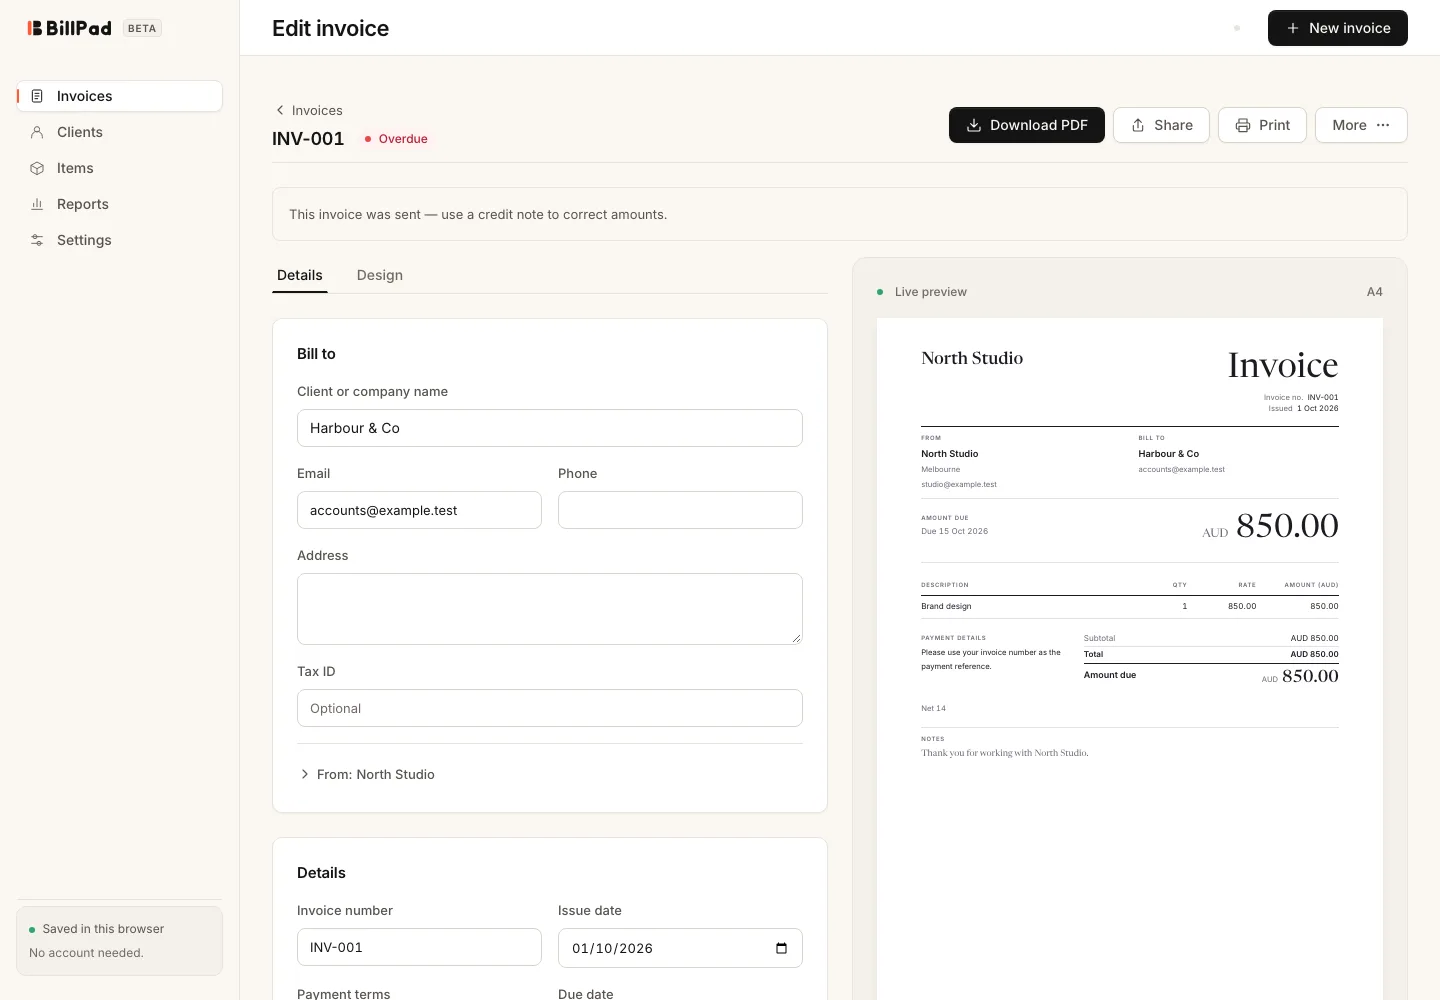
- In Bill to, enter Client or company name and any contact details needed on the invoice. Select a saved client if one is available.
- Check From:. Add your business name and the relevant contact or tax details.
- Review Invoice number, Issue date, Payment terms, Due date and Currency.
- Under Line items, enter a Description, Qty and Rate for each line. Choose Add line for another service or product.
- Review Discount & tax, then enter Note for your client and How to pay if needed.
- Inspect the preview. On a phone, choose Preview; use Edit to return to the fields.
Deliver the invoice
Choose Download PDF to save a file, Share to use available sharing options, or Print. If you send the PDF yourself, use More then Mark sent so the document's status reflects what you did.
Needs a signed-in account: BillPad email delivery. Choose Send, review To, optional Cc, Subject and Message, then choose Send email. Sending needs a connection and a successfully synced document.
Good to know
Draft changes save locally as you edit, but a storage warning means you must protect the current work before closing the page. Resolve validation messages before delivery. Do not record a payment just to mark an invoice as sent: Record full payment means money has actually been received.
For repeat work, start from a saved item or duplicate an existing invoice, then check the dates and amounts again. A reused document still needs a final review for this client's agreement.